How To Start A Fire: Your Complete Guide To Survival Campfires
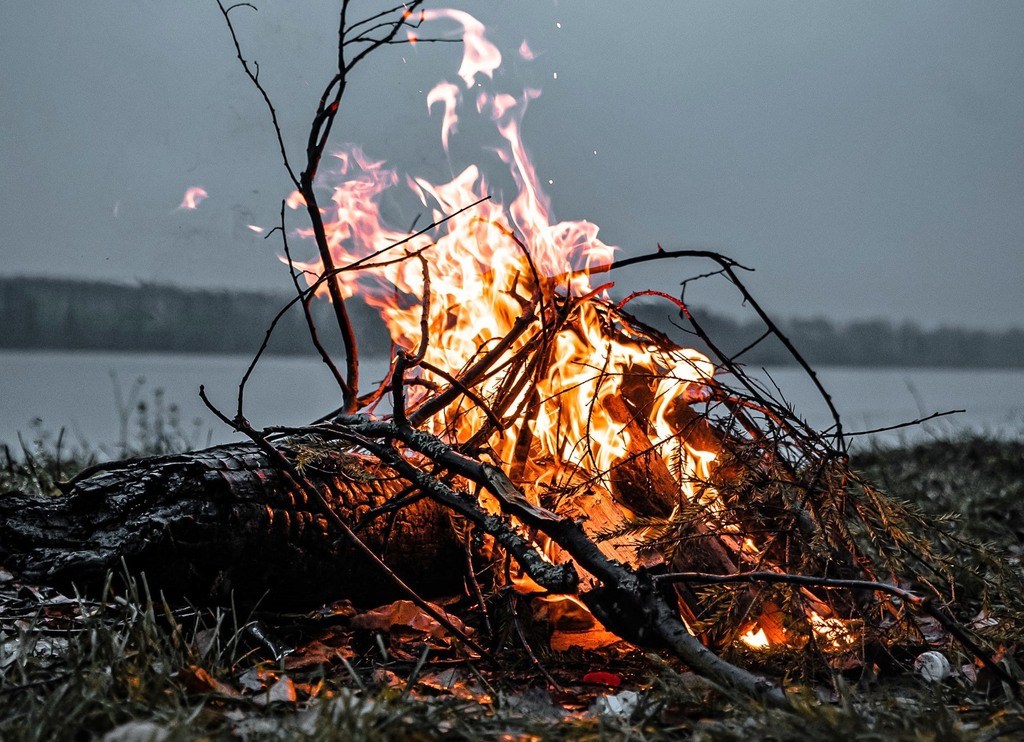
If you’re going to spend any time in the wilderness, knowing how to start of a fire is essential.
A fire will keep you warm, provide protection from wildlife, give you light and cook your food. It also provides nature’s version of entertainment.
So, if you find yourself in a survival situation, these factors cannot be overlooked.
Making a fire can be a challenge even for a seasoned veteran, if conditions are not the best.
For beginners, it can be a daunting task.
That’s why we’ve put together this complete guide of the best fire making techniques so you can learn how to start a fire even if conditions are not in your favor.
Choose A Suitable Location For Your Fire
When you find yourself in a survival situation, chances are you can’t assess how safe it is to start a fire at your location. You can get yourself into trouble if you start a fire in the wrong place.
So here are a few things to consider before you make a fire.
The site you choose should be at least 6 feet away from any plants, bushes and trees.
In dryer conditions, it should be even further, at least 8 feet away from any plant material.
And don’t forget to look up. Make sure there are no overhanging branches over the fire site.
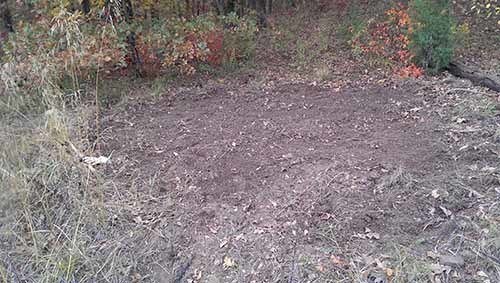
Your fire needs to be started on clear and bare ground. Any grass, ‘duff’ and debris need to be cleared away.
If you have to, make an improvised rake and use it to clear away debris and dig up the dirt until the site is clear.
Fires can be particularly dangerous in areas where there is a lot of pine duff. It may look like bare ground since there most likely won’t be much greenery growing on the ground.
But dry pine duff can build up into a thick layer, look brown and decomposed, but is highly flammable.
You have to make sure you scrape down to bare soil and clear the duff far away from your fire site.
If you find stones around your site, then use them to form a ring.
That will become your fit pit and help contain the fire.
You can make a small fire pit 1-1/2 feet to 2 feet wide. Or you can make a large one at 3 to 4 feet wide.
It depends on the size of fire you plan on making.
Just make sure the stone ring is large enough to contain the fire. If stones are not available, make sure you have created an area of bare ground large enough to be safe.
Materials And Fuel For Fire Lighting
Ignition
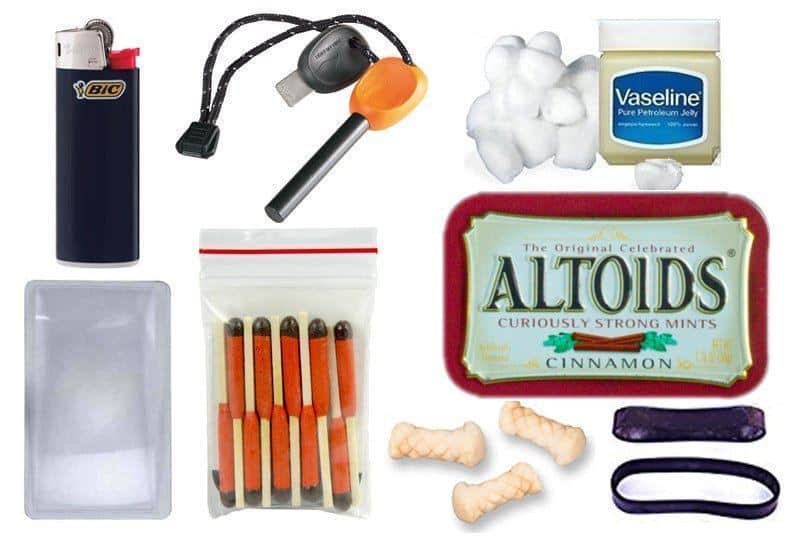
It starts with ignition. You can start a fire in many ways without matches or a lighter.
However, if you’re going into the wilderness, or traveling through it, it is highly recommended you carry a lighter, fire starter and/or matches on you or in your survival kit (see our survival gear list).
Preferably, carry more than one type of fire starter in case one isn’t working or breaks. Having a small survival fire starting kit in your pocket can be a lifesaver.
These tools provide the spark you need to ignite your fire.
Then comes the 3 main fuel sources that will feed your fire – tinder, kindling and logs.
Note: you need to collect and prepare all your fuel sources before you attempt to start your fire. Preparation is key for successful fire starting.
Tinder
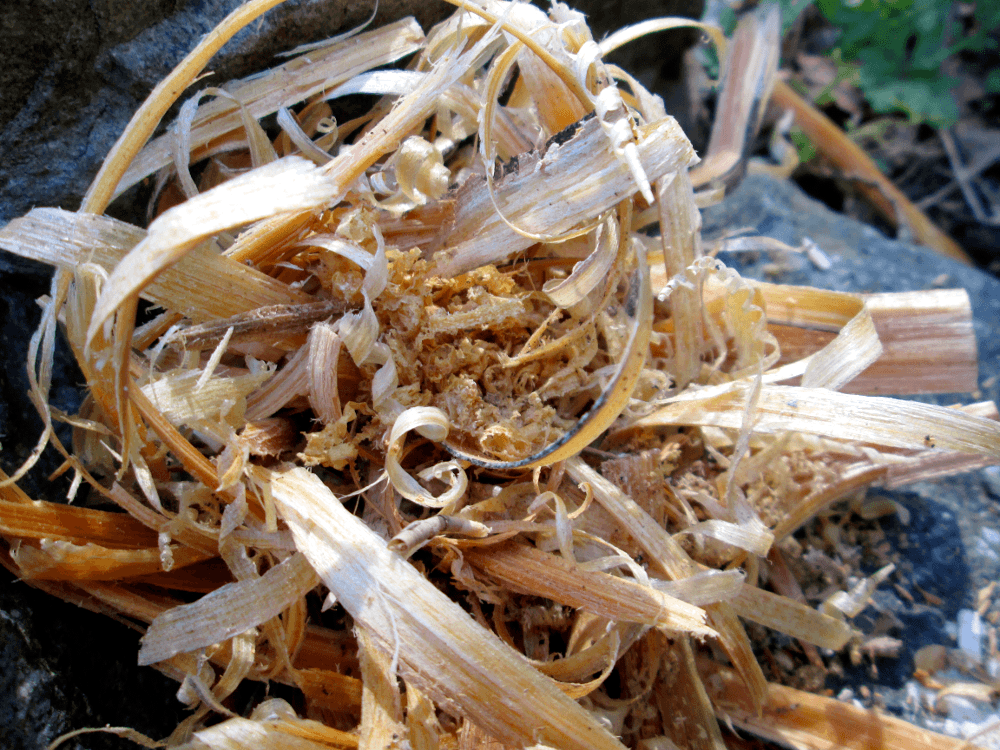
Tinder is the starting point for how to start a fire. It catches the spark or initial flame.
Small, light and dry materials will act as your tinder.
Pieces of paper, dry leaves, dry grass, fatwood shavings, small wood shavings or roughed up dry bark, dry moss, milkweed silk, cattail fluff, sock fluff, cotton balls with petroleum jelly, cardboard and lint can all act as tinder.
Look for anything dry that will catch a spark and ignite.
If you can, bring your own homemade tinder – like char cloth or cotton balls impregnated with petroleum jelly. In wet conditions, finding natural tinder becomes much more challenging.
A handy trick for making tinder quickly:
Carry a small pencil sharpener in your survival kit. They weigh almost nothing, don’t take up any room and they can quickly make razor thin wood shavings from a twig.
A pile of these shavings will easily ignite with a match, or with a ferro rod’s hot sparks.
Kindling
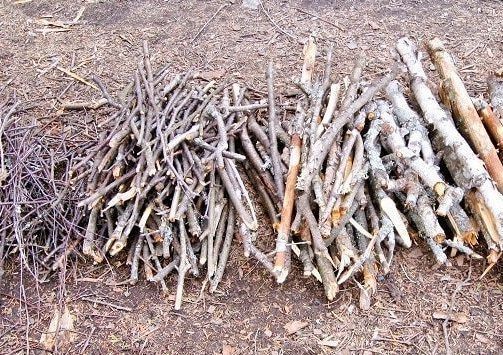
Small and medium sized sticks or split wood make up the next layer of combustible materials.
The goal is to use your burning tinder to ignite the small kindling. You will slowly begin to pile your kindling onto the burning tinder. Being careful not to smother the tinder and put out the flame.
You will want to collect small twigs and sticks, large chunks of bark.
Larger pieces of wood can be split into thinner pieces to act as kindling if need be. Pieces of kindling should be from 1/8” to ½” wide, from the width of a toothpick up to the width of your baby finger.
Any bigger and the tinder may burn out before the kindling can start burning effectively.
Kindling needs to be dry. Wet or damp wood will take too long to start burning or won’t burn at all.
The rule of thumb with kindling is you’ll need more than you think. A few small sticks won’t cut it. You’ll need a whole armful of this stuff.
The wetter the conditions, the more you’ll need.
Here’s why.
No matter what style of fire you build (and we’ll get into that in the next section), the purpose of kindling is to ignite the larger logs you’ll be placing on the fire.
Yes, the kindling will be producing flame.
But to really catch the large logs on fire, you need to build up a hot bed of coals that will generate enough heat for a sustained burn.
This is not as critical in dry conditions, but in wet or damp conditions, it’s absolutely critical.
This is a really important point that often gets overlooked.
It’s the real secret for how to start a fire.
The hot bed of coals that you create drives the fire. And that can take a substantial amount of kindling to make.
It’s better to have too much kindling than not enough.
Logs
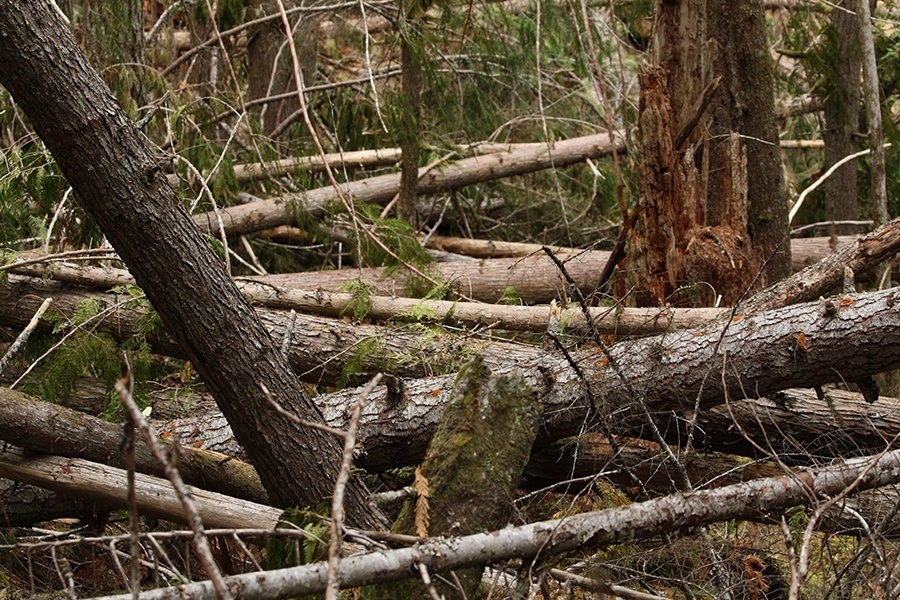
Wood logs act as your main fuel for a long-lasting fire.
In a survival situation, try to collect any size logs you can. It all depends on what’s available at your location.
This ranges from sticks the size of your thumb and up.
They don’t need to be huge (1 to 6 inches wide) to provide a good fire.
Smaller ones will initially burn better, providing more heat quicker.
Just remember, the smaller the logs, the more you’ll need to keep feeding the fire.
Larger logs will take longer to really catch but once they do, they last much longer.
Of course, try to collect wood that is dry. You can use an axe to split wood to various diameters. If you don’t have an axe, then a survival knife can be used to split wood by batoning.
Keep in mind that not all types of wood burn at the same rate. Softwoods such as pine, spruce, hemlock and cedar burn faster than hardwoods such as maple, birch, oak and ash.
So now that you have collected a tinder bundle, a large pile of kindling, and several logs that vary in size, you can arrange the style of fire you want.
Many different fire structures have been developed over the centuries.
Which one you choose will depend on the materials available, the environment you find yourself in and the weather conditions.
Let’s take a look.
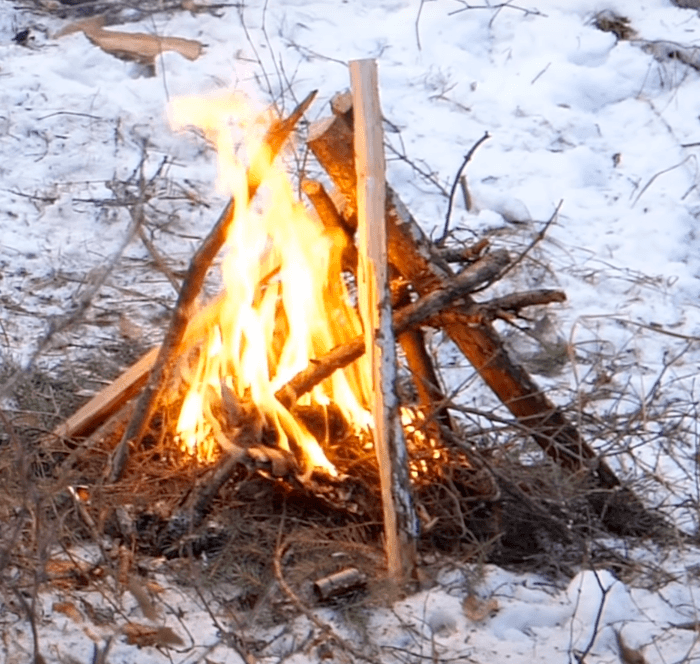
Teepee Fire (How To Start A Campfire That Burns Hot & Quickly)
The teepee fire is probably the most common type of fire to build. Its shape does a particularly good job of cooking food. Typically, they burn hot and they burn fast.
- Create your tinder bundle by balling it up and placing it in the center of your fire pit.
- Surrounding that, stack kindling in a teepee shape. Keep a gap in the teepee shape so you can reach the tinder bundle with your lighter or match.
- Then using larger kindling or small logs, create a larger teepee surrounding all that you’ve built so far.
- Then reach into the center and light the tinder bundle. The flame from the tinder will rise and reach the kindling. The kindling will slowly ignite and the flames will, in turn, ignite the next layer of kindling or logs.
- Once the wood burns through, the teepee structure will collapse. You simply add more wood in a teepee shape to your fire and the process continues.
The teepee fire burns relatively fast and produces a high flame. Which is ideal for getting a fire ready quickly for cooking.
Handy trick for how to start a fire:
Starting a fire directly on damp or wet ground can become extremely difficult.
It will draw in the moisture and cool the flame, quickly extinguishing it.
So how do you get around this?
Line the ground with some logs or evergreen boughs, and use them as a platform to build your fire on. This insulates your initial fire starting efforts from the wet ground.
While you get a roaring fire going, the heat being generated has a chance to evaporate the ground moisture away without having much impact on your fire.
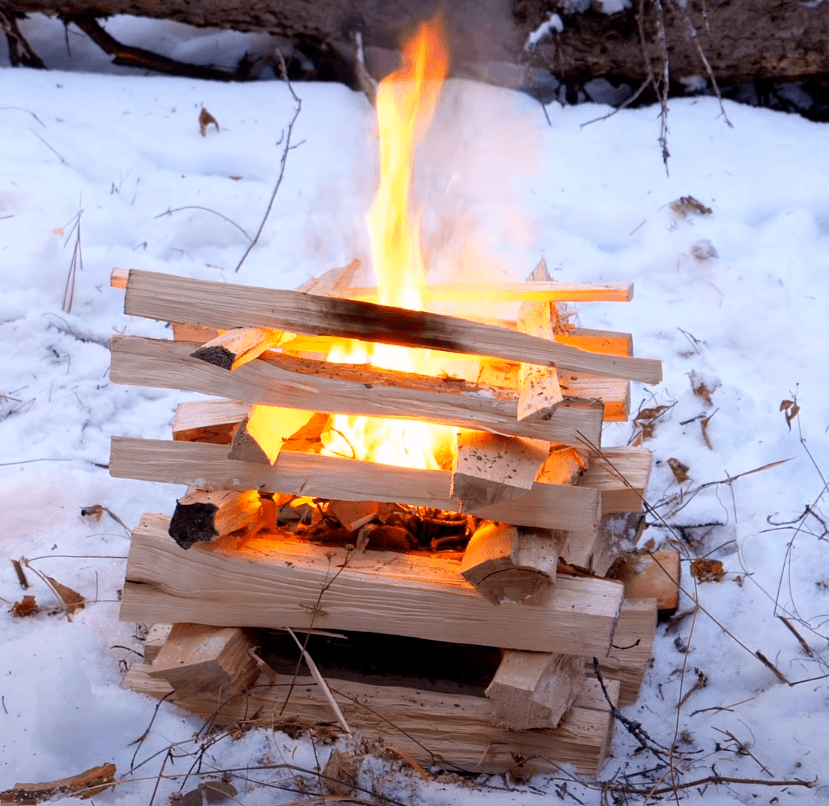
Log Cabin Fire
The log cabin fire is a slower burning, longer-lasting fire.
On colder nights when you have limited firewood, the log cabin fire is ideal for keeping warm.
It may not have the intense heat of the teepee fire, but you can snuggle up closer to the lower flames and longer burning time.
- Start by placing your tinder bundle in the center of your fire pit.
- Stack some kindling around your tinder bundle like a teepee (same as the teepee style fire).
- Lay 2 logs on either side of your small teepee. Then stack 2 more logs on top of the first 2 logs in the perpendicular direction, so that you’re surrounding the teepee.
- Then stack 2 more logs on top of previous layer, and continue the process until you’ve created a pyramid (or log cabin) shape surrounding the teepee.
- Don’t forget to stack a few pieces of wood on top – that’s the roof! They’ll be directly in the path of the flame and produce a nice fire.
- Reach in and light the tinder bundle.
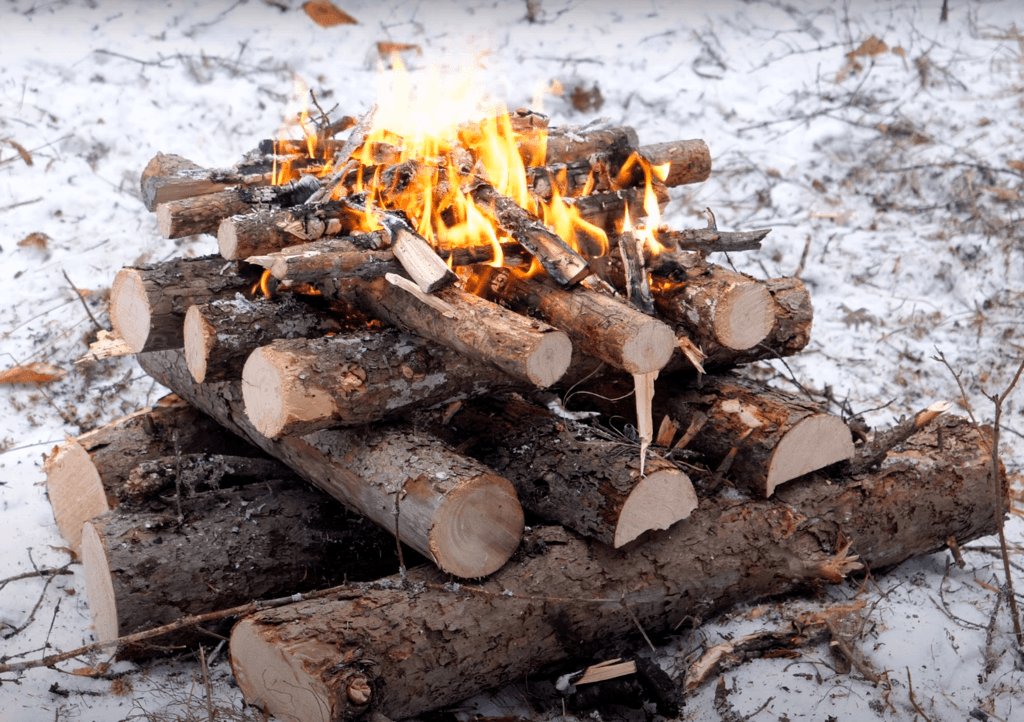
Upside Down Fire (How To Start A Fire That Is Long Lasting)
This fire lives up to its name – and turns everything on its head. Also known as the modified pyramid fire, you basically build a pyramid of logs.
Instead of lighting a tinder bundle underneath and let the fire burn upwards, you start the fire on top of the stacked logs.
So, what’s the benefit of doing it this way?
The coals of the fire on top drop down onto the dry wood below which then begins to burn.
This process happens much slower than a teepee fire where all the wood is combusted at the same time. With the upside down fire, it takes longer for the layers to catch fire since coals need to drop down in order to ignite the lower layers.
The process where the hot coals from the fire above drops down to the lower layers can be slowed down dramatically by filling the gaps between the logs with a little dirt.
This prevents hot coals from falling down to lower layers until the current layer of logs burns through first.
It has been shown that a fire of this type can last up to 24 hours (sometimes even longer). It depends on how many layers of logs you start with and what type of wood you choose.
Hardwood will burn longer whereas softwood burns much quicker.
It takes much more effort initially to build this fire structure. But once you build the pyramid and start the top fire, you’ll add very little wood to this fire.
So, if you have a limited amount of firewood and want to make it last as long as possible, the upside down fire should be your choice.
It’s a slow burning fire with small flames and takes a while to build up a bed of coals on top so it’s not ideal for cooking but it will still work.
- Start by placing a row of large logs side-by-side in your fire pit to form a base.
- If you want a longer lasting fire, then spread some dirt between the logs just until the gaps between the logs are filled. Don’t cover the entire logs, just fill the gaps.
- Add the next layer of logs which should be a little shorter and a little smaller than the previous layer. Lay them across the previous layer in the other direction. Again, fill the gaps of this layer with a little dirt.
- Continue this process until you’ve built an almost completed pyramid of logs, arranged in several layers. Each layer has dirt filling the gaps between the logs. Don’t go so high as to make a complete pyramid – you need a flat surface on top to start the fire.
- Place your tinder bundle on top of the pyramid.
- Place kindling over the tinder bundle in a teepee arrangement. Leave a gap so you can reach the tinder bundle.
- Reach in and light the tinder bundle.
- Add kindling as needed to keep the fire going until a coal bed has formed.
- Once the coal bed has formed, it will cause the top log layer to burn.
- As that top layer of logs burns through, the coals from it will then ignite the next layer. And so on. The dirt between the logs prevents coals from prematurely dropping down into the pyramid and turning the whole thing into a roaring fire.
If you take your time carefully making the pyramid, this fire can last hours upon hours without much input from you.
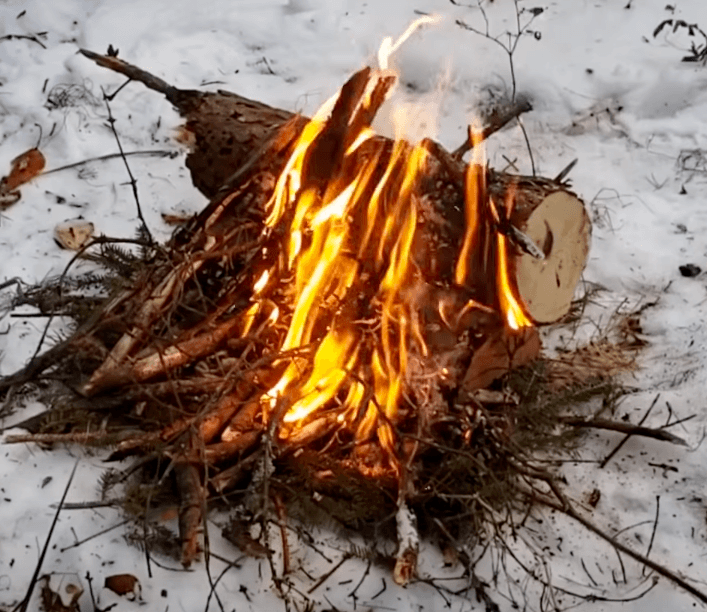
Lean-To Fire
If it’s windy, this is how to start a fire.
If your location has a lot of wind, then a lean-to fire can be your best option.
It’s basically a large log with several other smaller logs leaning up against it.
The large log acts as a windbreak helping you with starting the fire in windy conditions.
It also makes for a great cooking platform. (Check out the Best Campfire Cooking Kits)
- Place a large diameter log in your fire pit on the upwind side. This is going to act as your windbreak.
- Then place your tinder bundle up against the side of the large log.
- Place smaller diameter kindling around your tinder bundle leaving a little gap for access.
- Then layer larger diameter kindling on top of the first by leaning them against the windbreak log.
- Then reach in and light the tinder bundle.
- As the wood burns through just add logs by leaning one end of the logs against the windbreak log.
Eventually the leaning logs will burn through and collapse. When they do, you have a perfect bed of coals on or over which to cook.
The lean-to fire is one of quickest and most effective fires to make for survival.
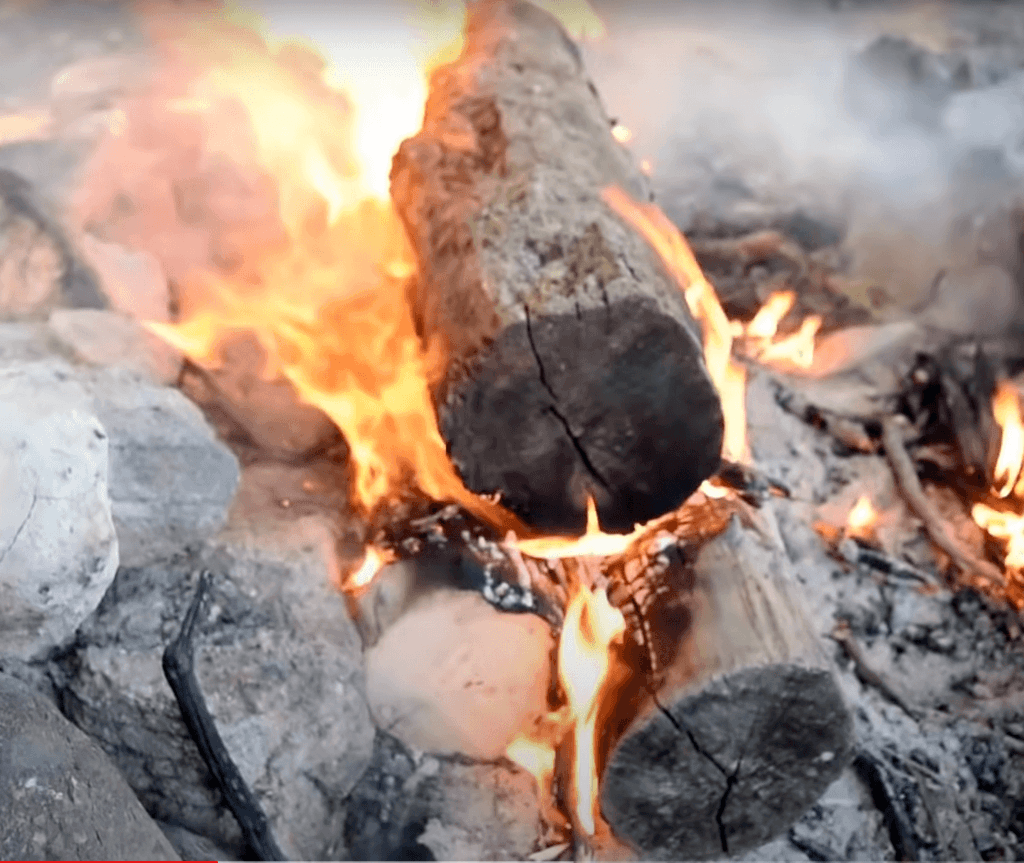
Long Fire (How To Start A Fire That Lasts All Night)
The long fire is well suited for extreme cold temperatures. It gives off a huge amount of heat.
And it can burn all night long.
This type of campfire is well suited for the northern boreal forest where timber is plentiful.
But it can be used anywhere where you have decent sized deadfall or dead standing timber.
- Collect 3 times more tinder material than you normally would. You’re basically going to be starting the fire in many different places. Find as much birch bark as you can.
- Collect 3 knee high piles of small kindling to get the fire started.
- Collect 3 knee high piles of larger kindling (1 to 2 inch diameter). These will be needed to help establish the fire and create the hot coals that will ignite the logs.
- Collect at least 3 (preferably 6) 6 foot long substantial logs. These will be deadfall or dead standing trees that can be pushed over and dragged to your fire site.
- Check the direction of the wind as you don’t want smoke to blow directly at you or your shelter.
- Take 10 to 12 pieces of your larger kindling and line the ground. Space them out over the entire length of a big log. You can use more large kindling if you want.
- Take two large logs close in size and align them along the on top of your line of kindling. Make sure the logs are elevated so air can flow underneath. Keep the 2 logs about 6 inches apart from each other. This lets you put small kindling between them and then stack another log on top.
- Place half of your small kindling between the 2 logs, extending over the entire length.
- Mix in 2/3 your birch bark and tinder with the small kindling, distributed along the entire length.
- Keep the other 1/3 of the birch bark and tinder for starting the fire. Rough up the birch bark with a knife or stick to help release oils and fibers that will catch fire more easily. This will be part of your first tinder bundle.
- Use your lighter, ferro rod or matches to light your tinder bundle.
- Place the tinder bundle in the center of your fire structure.
- Add small kindling to grow the flame.
- Once your center fire is established, use some of your ignited small kindling to ignite the other birch bark and tinder along the fire lay.
- Once your fire is fully lit, add the rest of the larger kindling to help fuel the fire and produce a substantial amount of hot coals.
- You can then add your top log. Make sure it rests snugly on top of the other 2 logs so it dampens the flames. This creates a long lasting fire. Remember, the airflow will come from the bottom since the bottom logs are raised up on a bed of large kindling.
- If you collected more than 3 large logs, add them as needed throughout the night.
How To Start A Fire Without Matches or A Lighter
Lenses
Now let’s say you don’t have a lighter, ferro rod or matches. There are other ways to get a fire started.
A lens can be used to start a fire on a sunny day. A lens from a pair of glasses, magnifying glass, camera and binoculars will all work.
You can even create a lens effect using a plastic bottle and water. It’s called a liquid lens.
Here’s an incredibly handy way of creating a liquid lens using a Ziploc sandwich bag.
Place the lens between your tinder bundle and the sun.
Move the lens closer or further from the bundle until the sun’s rays focus at the tinder bundle.
With some patience, the concentrated beam will ignite your tinder.
The downside of course is you need sunlight. So, you shouldn’t rely only on this method in a survival situation.
Friction Fire
This is how to start a fire with sticks.
Friction creates heat. With enough friction, you can generate enough heat to create a smoldering ember.
That ember can be used to ignite a tinder bundle.
The best way to use friction to start a fire is by making and using a primitive bow drill.
By simply using sticks, some flat wood and some cord, you can make fire.
This video explains in detail how you would make a bow drill and use it in a survival situation.
Extinguishing Your Fire
Extinguishing your fire in a wilderness survival situation is just as important as making it.
If you don’t put the fire out completely, you could be responsible for a brush or forest fire.
One you could find yourself trapped in.
One key thing to do is tend the fire until it’s completely out and cold. Then you know for sure it’s out.
If you are unsure and water is nearby or if you have some with you, then you can sprinkle some water over the ashes. Stir the ashes and then sprinkle more water over them.
Repeat until the ashes show no signs of steaming or hissing and are cold.
Learning how to start a fire in the wilderness is a skill you’ll never forget.
It’ll give you the confidence in yourself and your abilities that can be crucial in survival situation.
Remember, practicing your survival skills makes perfect. Fire starting applies to wilderness survival skills, urban survival skills and long term survival skills. So, get out there and practice in a safe and responsible way.
That way you’ll know exactly how to make fire no matter situation you find yourself in.


