How To Make Your Own Arrows
Bowyers have been making their own arrows for centuries, and there are many reasons why people make their own arrows today.
One of the most common reasons is that they want to shoot an arrow that is consistent in weight and balance.
Another reason is because they want to make sure that they are using the best materials available for their equipment.
And finally, there are those who enjoy the craftsmanship and sense of self reliance that comes with making your own equipment.
And you never know what may happen – if the SHTF, it may become one of your critical urban survival skills, wilderness survival skills or long term survival skills.
Whatever your reason is, this is how to make your own arrows.
Table of Contents
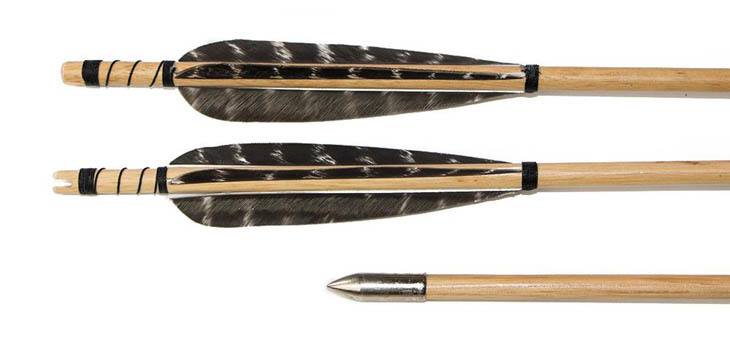
Basic Parts of An Arrow
Arrows have been used as a projectile weapon for hunting and warfare throughout human history.
They serve only one function, which is to hit a target accurately from a distance. In order make this happen, the arrow must have certain key components.
An arrow has four main parts that are important to its functioning:
- the point or tip, which is an arrowhead usually made from metal or stone;
- the shaft, which provides support and balance for the arrow’s flight;
- the fletching towards the back end of an arrow which provide stability in flight by causing the arrow to spin or creating a slight aerodynamic drag;
- the nock, the very end of the arrow that interfaces with the bow string.
So, let’s start with…
The Arrowhead
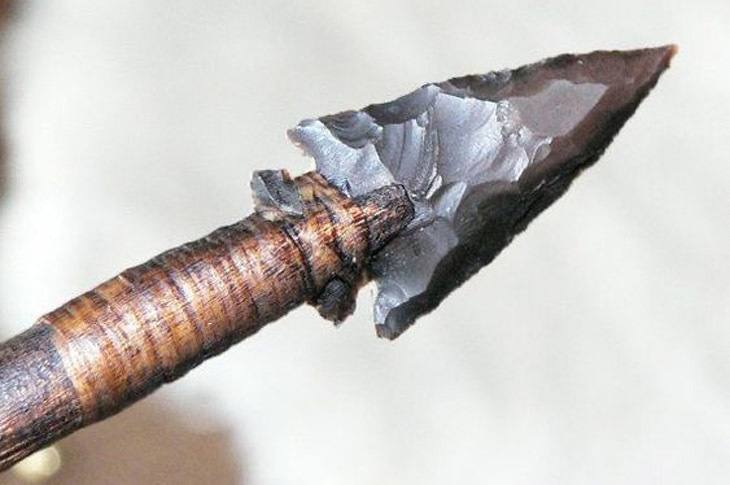
The Arrowhead, or the pointy end that hits the target, was traditionally made from stone, and later metals, although bone and ceramic were also used.
For our purposes, there are a few materials that you can use to make a primitive arrowhead, including rock, a piece of metal, glass, ceramic, or even just some wood.
In a survival situation, you can improvise an arrowhead from a piece of plastic like a credit card, or a metal key.
The Shaft
The shaft of an arrow is the long thin “stem” that you attach the arrowhead to. The shaft can be made of wood, plastic, fiberglass or metal (mainly aluminum).
What wood is best for making arrows?
The most common types of wooden shafts are those made from hardwoods such as maple, oak, beach, hazel, poplar, ash, birch.
White pine and fir make good arrow shafts and are typically lighter.
The Fletching
The fletching on an arrow is the feathering of the shaft.
Fletching is usually made of feathers taken from a bird, but sometimes it is made of plastic or synthetic materials.
A shaft with a feather fletching is called “feathered”, while one without is called “unfeathered”. Some arrows have no fletching and are called “bare shafts”.
The Nock
The nock is the small cut made in the end of the arrow shaft where it will be mounted on the bowstring.
It allows the arrow to grip the bowstring while you pull that bowstring back to take a shot.
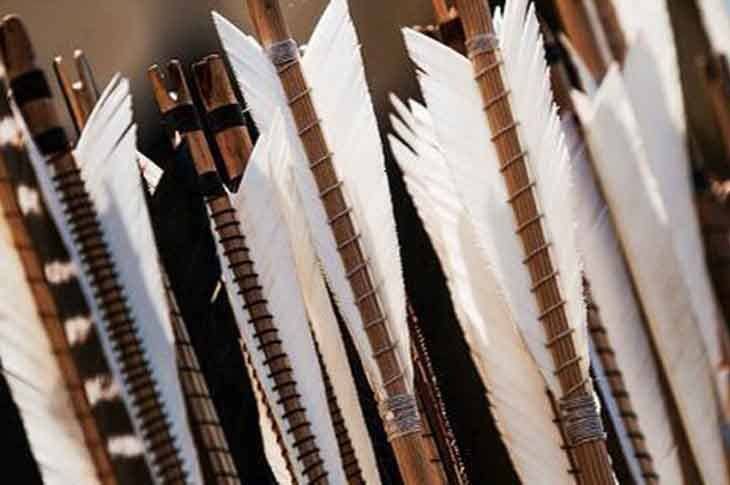
How To Make Your Own Arrows
Let’s break this process down.
To make an arrow, let’s take a look at making each part of the arrow separately and then put those pieces together.
First, let’s take a look at how to make the arrowhead.
How To Make Your Own Arrowheads
This is probably the most important part of making an effective diy arrow.
You can make an arrowhead of various materials including found pieces of metal, rebar, stone, bone, glass, porcelain or even just wood.
This is where you can customize your arrowhead by changing the design, size, shape and material. When making a head for an arrow, the first thing you need to do is decide on what type of head you want.
Here are the 3 main types:

Target Arrowheads
Target arrowheads are one of the most popular types of arrowheads used in archery.
They have a wide range of uses, but their most common use is as a target or field point to shoot at a stationary or moving target.
Target arrowheads are typically smaller than hunting arrowheads (broadheads) and are used for shooting at shorter ranges.
The bullet point or field point are popular for many reasons. They tend to cause less damage to the target than a broadhead, but still have good penetration. There are other specialized target arrowheads like the JUDO point (grabbing) and fish point.
Blunt Arrowheads
Just as the word suggests, Blunt arrowheads are a type of arrowhead that are not as sharp as other types.
They have a blunt point and a dull edge, so they cannot be used to slice into prey like other arrowheads can. Instead, they cause blunt force trauma to stun, knock out or kill small game.
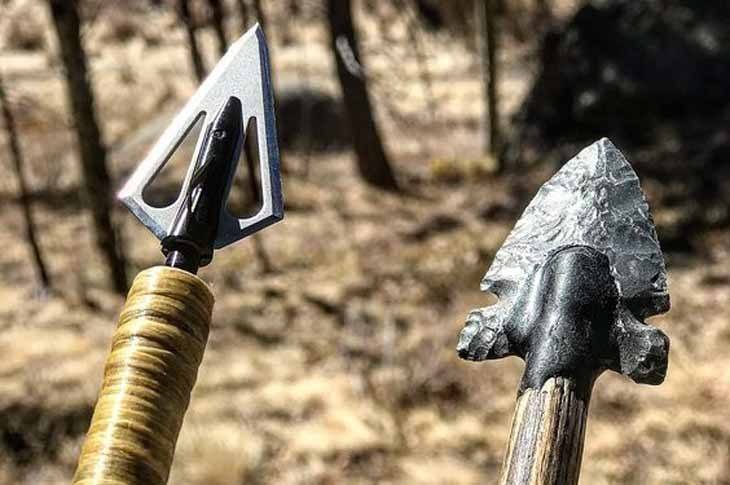
Broadheads
Broadheads are arrowheads with a bladed or triangular shaped head. These heads usually have sharp cutting edges and a sharp point. They are designed to create a large wound in the victim which creates greater blood loss than a target arrowhead would.
So, in hunting situations where accuracy and force are equally important, a broadhead is used.
Here are the steps required to make your own arrowheads:
The most common way to make your own primitive arrowhead is to find a suitable ‘flaky’ stone material like slate, flint, chert or obsidian and break off pieces into triangular shapes using a hammer. You can do the same thing with glass or ceramic.
Trimming and shaping stone, glass or ceramic arrowheads is accomplished through a process called “Knapping”. To do this, strike lightly against the edges with a nail or screwdriver to produce jagged, sharper edges.
The next step is called “grinding”. That’s where you use a stone or sandpaper to grind away the edge material. This will make the blade sharp.
And since this is supposed to be used for cutting things, it needs to be sharp!
Lastly, make little indents in the bottom of the arrowhead which will attach it to the shaft. Make these by sanding or chipping away material until you have semi-circle notches like the image below. You will use these notches when attaching your arrowhead to the shaft.
How To Make An Arrowhead
Instead of explaining the whole process in painful detail, check out this how-to video that shows you exactly how to make a primitive arrowhead.
How To Attach An Arrowhead
There are three ways to attach an arrowhead to an arrow shaft: tying, binding, or gluing.
The first way is to tie the head onto the shaft with a strong string or sinew. This process is called “hafting”. This can be accomplished by wrapping the string around the shaft and then around the head several times before tying it off at one end.
The second way is to bind it with wire, which can be done by simply twisting wire around the arrow tightly, trimming off both ends close to each other and then twisting the ends together.
Finally, you can glue it on with a strong adhesive such as epoxy or superglue.
How to Sharpen An Arrowhead
There are three different ways to sharpen an arrowhead: using a rock, using sandpaper, and using a metal file. They each have their own benefits and drawbacks.
You’ll notice that making the edge of an arrowhead (described above) and this sharpening process are practically the same.
The first way to sharpen an arrowhead is by using a rock. This method is the most common way because it’s easy and quick but also provides the least amount of control over the shape of the head.
As mentioned above, knapping is a technique to chip off small pieces of material to create a sharp edge. You can create a sharp edge on your arrowheads by taking the time to nip the edges carefully.
The second way is by using sandpaper which provides more control over the shape of the head but takes more time than simply using a rock and requires some skill in order to use properly.
The third way is to use a file (if you have a metal arrowhead). You can find metal files at most hardware stores and they come in different shapes and sizes.
The size of the file you need depends on the size of your arrowhead, so make sure it fits snugly into the grooves of your file before you start sharpening it.
Hold your file at a 45 degree angle and move it along the length of the blade in small circles. You should do this for about 5 or 6 passes.
How To Make An Arrowhead Out Of Rebar
How To Make An Arrowhead Out Of Toilet Porcelain
How To Make An Arrowhead Out Of A Glass Bottle
Stone Arrowhead vs Modern Broadhead – Deer Penetration Test
Good to know the handmade stone arrowhead did just as good of a job as the steel one in this test.
But to skill up, you need to be patient and practice your arrowhead-making skills, and eventually you’ll get similar results.
If you don’t want to invest the time or energy making your own broadheads, then buy some good broadheads online and attach them to your arrow shafts.
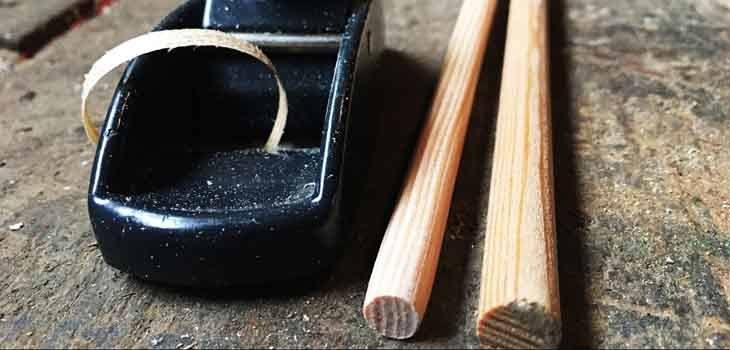
How To Make Your Own Arrow Shafts
The most common materials for arrow shafts are wood, aluminum and fiberglass. Carbon-fiber is becoming more popular as well.
They are strong and rigid enough to do their job, but can also be machined and molded to make them easier to create.
To make a good arrow shaft, you want it to be balanced and symmetrical. In the end, the entire thing should be perfectly straight and round.
Regardless of what material you choose, the process is the same.
Selecting Your Arrow Shaft Material
If you are getting a piece of wood for crafting shafts, look for something with few imperfections. Fewer knots and less warping are preferable.
Now take your wood and cut it into a number of long, square pieces.
Determine your desired overall length and then cut them.
Here’s a video on how to pick the best wood for your arrows and how to start your arrow shaft.
Arrow Shaft Making Jigs
Handmade arrow shafts are usually made from pieces of wood, typically from the lower section of a tree trunk.
The process of making arrow shafts is not difficult, but it can be time-consuming. Making them by hand can take hours but you get the satisfaction of handcrafting your own.
But if you want to speed up the process, you can make them with some simple tools, and this will produce a more uniform product than handmade shafts.
The key idea here is to attach a long piece of wood stock that is about 1/2 to 3/4 inches (1.5 to 2.3 cm) square and about 3 feet long (1 m) to a drill and then run it through a cutting blade to shave off material from the wood stock.
(The final length of your arrow shaft will depend on your bow’s draw length so it will be different for everyone.)
It’s this spinning action that produces a perfectly round arrow shaft.
Now, let’s see how we can do just that.
The types of jigs used to make arrow shafts includes: shafting jig, taper jig and tapered reamer.
- A shafting jig is a tool that has a straight tube with one or two holes and uses a screw to secure the proximal end of the arrow shaft in order to provide a straight and accurate shaft. This tool is generally made from aluminum.
- A taper jig is a tool that has a straight tube with one or two holes and uses a screw to secure the proximal end of the arrow shaft in order to provide tapers on both ends of the arrow shaft. This tool is typically made from brass or aluminum.
- A tapered reamer is a tool that has a straight tube with one or two holes and uses a screw to secure the proximal end of the arrow shaft in order to provide tapers on both ends of the arrow shaft. This tool is typically made from brass.
The process to make an arrow shaft is exactly the same as making a dowel. So here are some videos that show you how to make dowels using readily available tools and jigs.
1. Simple Dowel Making Jig for The Table Saw
2. Making Arrow Shafts with The Veritas Dowel Maker
3. Old School Dowel Making Jig
4. How To Make Your Own Arrow Shafts With A Shooting Board
Fine Tuning Your Arrow Shafts
You can now start the process of balancing your arrow shafts.
Now that your shafts are as straight as possible by making them with a jig, you will need to make them round by sanding them.
This will ensure that your arrow shafts are smooth and not jagged.
There is no right way to do this, so you might need to experiment with a few different grits of sandpaper.
Be careful when using power tools on the ends of your arrows!
Use an Arrow Spinner
An arrow spinner is a tool that is used to balance the arrow shaft. And balancing the shaft is an important arrow making step – don’t skip it.
Checking the roundness of an arrow shaft with an arrow spinner is a quick, easy way to see if there is any imperfections in an arrow shaft’s shape.
The arrow spinner holds the arrow upright while rotating it around a center point.
How To Make Your Own Arrow Spinner
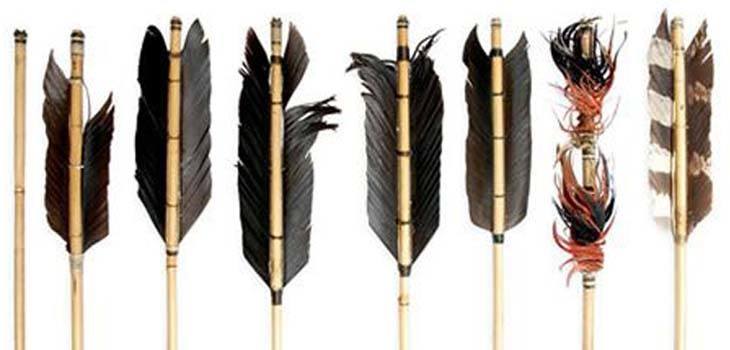
How To Make Your Own Fletching
Fletching is the process of attaching feathers or vanes to an arrow. The word comes from the Old English word meaning “to furnish with feathers”.
The fletching on an arrow serves a few purposes, most notably to stabilize and guide the flight of the arrow. It also can be used as a visual aid to judge how straight the arrow flies.
Bird feathers are the traditional choice for arrow fletching but many modern materials make great fletching, so feel free to improvise.
How hard is it to Fletch your own arrows?
Like any other crafting, fletching is detail work and needs care to make it right. But it is not difficult to make or attch the fletching to the arrow shaft. ike any other craft, it just takes a little practice and you’ll be able to fletch an arrow in no time. There are some easy ways to improvise fletching – which are important to know if you’re in a survival situation.
Here is an easy way to make your own fletching:
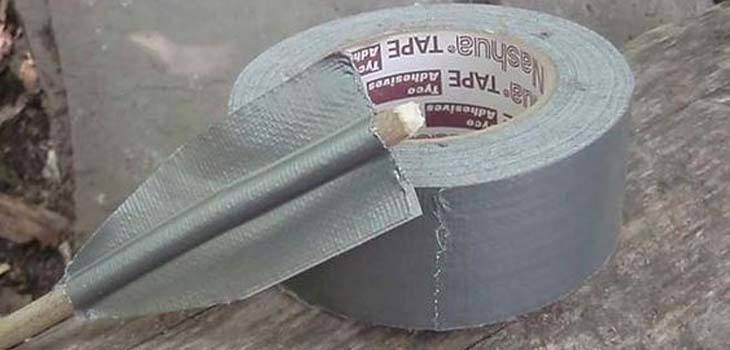
Make Duct Tape Fletching
Duct tape is a great material for fletching because it’s cheap, durable and you can use different colors. This is a quick and easy project that anyone can do.
You will start by cutting two strips of duct tape about two inches wide and long enough to fit around the shaft of your arrow.
Next, you will want to fold the strips in half, sticky side out, so that it creates a loop with adhesive on both sides.
Next, wrap the loops around the shaft of your arrow and then smooth out any wrinkles or bubbles in order to seal them shut.
Finally, make a series of diagonal cuts into the tape to create fletching. Be careful not to cut the shaft of your arrow too short when creating fletching with duct tape.
How To Make A Homemade Fletching Jig
A homemade fletching jig can be made from many different materials, such as wood, metal or plastic.
Some people use their fingers and nails to apply the feathers and some use a simple clamping device.
Here’s a simple and easy way to make a fletching jig.
If making your own fletching jig is not your thing, you can get well made fletching jigs that will make your life much easier than doing it by hand.
One the best made fletching jigs you can buy is the Bitzenburger. You can get right, left, straight or helical feather attachment setups.

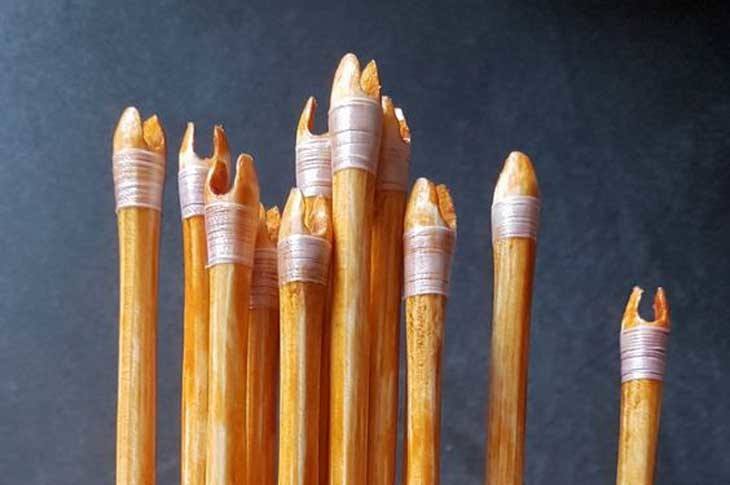
Adding The Nock
An arrow nock is the notch at the back of an arrow, where the bowstring sits. The notch can be cut into the shaft or it can be a separate piece that is attached to shaft end.
The purpose of an arrow nock is to provide a place to grip the bowstring and stay in place while it’s being used by the archer. Without this notch, it would be very difficult for an archer to shoot their arrows.
How to Make an Arrow Self Nock
Making a nock is not as hard as it may sound. But is has to be done properly. Check out this video that shows you how to create a nock on the end of your arrow shaft using simple hand tools.
Horn Inserts for Nocked Arrows
When you shoot an arrow, the nock receives the highest forces. So, it experiences a great deal of wear and tear.
To help with that, you can add an insert to your nock. This hard material will help keep the end from splitting. Using bone or horn for inserts works very well.
Here’s how you do it:
After all of that, you may just want to purchase your nocks online and then attach them to your arrow shafts. It saves you all kinds of time and effort.
The only thing you need to do is taper the ends of your shafts so the nock can fit on the shaft. You can use a taper tool for that process.
And then glue the nock onto the end of the arrow shaft.
Tapered End For A Nock
How To Build Arrows – Putting It All Together
Now that you know how to make all the individual parts of your arrow, it’s time to put it altogether.
The best way to describe it is to show you. Here’s how to assemble your parts into your own effective arrow.
1. How To Make Your Own Arrows – Starting from Board To Round Shaft
Part 2. How To Make Your Own Arrows – Attaching Arrowhead and Nock
Part 3. How To Make Your Own Arrows – Preparing & Adding Fletching
And That’s How To Make Arrows
Combining well made diy arrows with the best bow for survival and you have a potent combination for hunting and protection in any survival situation.
And now you have the knowledge you need to start making arrows. But if this is new to you, then you may not have the skills yet to make it happen.
The only way to gain these skills is to go out and try them yourself.
Find some suitable wood, cut it up into long strips, run it through a dowel making jig and make sure it’s straight, make your own arrowhead from stone, bone, glass or ceramic, add your homemade fletching and nock.
Then test out your new arrow. The fun part!
And that’s how you make your own arrows.


